- DATE:
- AUTHOR:
- PowerSync Product Team
Write Path Guides and a Reference Write Implementation
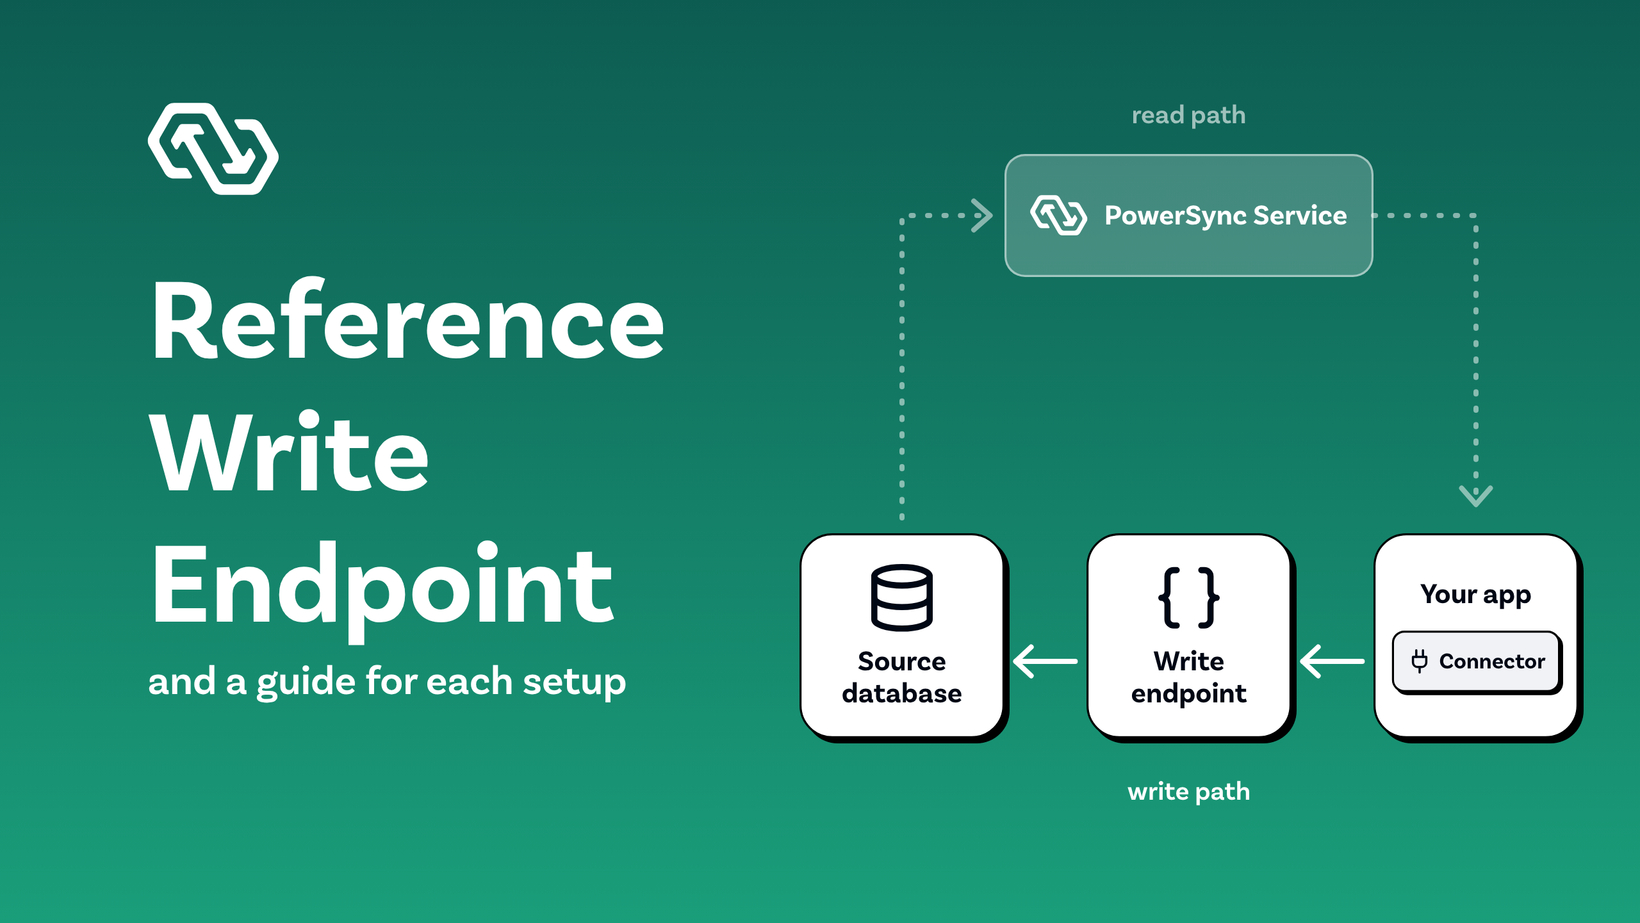
Setting up your app's write path is now a lot simpler. PowerSync syncs data from your source database to your app, and your app uploads the changes your app makes to your backend. We refer to the endpoint in your backend that receives these uploads as the write endpoint.
If your app reads data but has no write endpoint yet, you can start from our reference write implementation instead of building it from scratch. It authenticates mutation uploads from clients (a mutation is any data change made by a client) and also includes a client connector that uploads your app's local mutations to the write endpoint.
If your app already has an API for writes, or uses Supabase, our docs now have more in-depth guides for those options too.
Why we built it
By design, PowerSync never writes directly to your source database. The client SDK records your app's mutations in an upload queue (FIFO/outbox), and your app uploads them to your backend's write endpoint, which applies them. Your backend is where your business rules and authorization go. Mutations pass through your own API, not straight into your source database, so you can add domain-specific checks and conflict handling as needed. If your app has a pre-existing API for writes, it can quite likely be re-used by your PowerSync app.
Without a write endpoint, that's a lot to build, and there was little guidance in our docs beyond some example projects and snippets. We kept seeing the same problems:
Converting values from SQLite back to the types in your source database, such as
0and1to booleans.Forgetting to call
complete()after a successful upload, so the SDK uploads the same mutations again.Telling apart failures that a retry can fix and mutations that your backend will never accept.
Sending a transaction's mutations as separate requests, which meant a failed request leaves only part of the transaction applied, such as an order without its line items.
We wanted a solution that avoids most of these problems by default, and that you can adapt as your app gets more complex. With the reference write implementation, most apps get working uploads with minimal configuration. When your app needs more, such as custom error handling, you can extend only that part.
Choose your setup
Each setup gives you an uploadData() function for uploading mutations from the client, and a write endpoint to receive those. Which one fits depends on whether you use Supabase, and whether your app already has an API for writes:
Supabase PostgREST: If you use Supabase and don't need each transaction applied atomically,
uploadData()writes to your tables with the Supabase client SDK. You don't deploy a separate write endpoint, and your RLS policies authorize each mutation. See Supabase: PostgREST Route.Supabase Edge Function: If you use Supabase and need atomic transactions or custom write logic, deploy the reference write endpoint as an Edge Function. Your app will use the reference connector. See Supabase: Edge Function Route.
Existing API: If your app already has an API for writes, keep it as your write endpoint, and write an
uploadData()for it. See Use Your Existing API.Reference write implementation: If you don't have a write endpoint and a Node.js backend works for you, run the reference write endpoint. Your app will use the reference connector. See Reference Write Implementation.
Your own stack: If you don't have a write endpoint and want one in your own stack, build one that follows the reference API contract. Then your app can use the reference connector. See Build Your Own Write Endpoint.
Many of these guides include relevant prompts for your coding agents too 
The reference write implementation
The reference write implementation gives you both parts of the write path. They share an OpenAPI spec:
Reference write endpoint: A Node.js server that applies uploaded transactions to your source database. It supports Postgres, MongoDB, MySQL, and SQL Server.
Reference connector: A backend connector whose
uploadData()sends the queued mutations to the reference write endpoint. There's one for each SDK in Backend Connector Examples. You copy it into your app and change it as needed.
The reference write endpoint verifies the same JWT that your app sends to PowerSync, so your app uses one token for syncing and for uploads. It applies each transaction to your source database atomically, and tells apart failures that a retry can fix from mutations it rejects.
You can run the reference write endpoint on your own server, with Docker or Node.js, or on Supabase as an Edge Function.
Set it up
Clone the repository, and set
DATABASE_TYPEandDATABASE_URIfor the database that your PowerSync instance replicates.Configure the reference write endpoint to verify the same JWTs as your PowerSync instance.
Start the reference write endpoint with Docker or Node.js.
Copy the reference connector for your SDK into your app, and pass it to
connect().Add your authorization checks to
authorize().
See the Reference Write Implementation docs for the full steps. On Supabase, follow the Edge Function route instead.
Requirements
Reference write endpoint: Docker, or Node.js 24 and pnpm 9. For the Supabase Edge Function, you only need the Supabase CLI.
Auth: The reference write endpoint verifies JWTs signed with asymmetric keys, which we recommend for production. PowerSync does also support symmetric keys (HS256), so if your app uses them, you could adapt the write endpoint's token verification to accept them. The Supabase Edge Function also requires Supabase Auth, with the asymmetric signing keys that are the default for new projects. Projects that use the legacy JWT secret must migrate first.
MongoDB sources: The reference write endpoint uses transactions, which need a replica set or sharded cluster. Each collection also needs a
$jsonSchemavalidator that declares the type of_id.
Before production
By default, the reference write implementation is configured for development, so you can get started with minimal setup. Before you go to production, review the production checklist in the docs. It covers the changes that most apps need to make, such as adding your own authorization and deciding how to recover mutations that fail.
Try it
Setting up the write path used to come with plenty of footguns. We hope that with this working implementation to start from, and a guide for each setup, it's now much easier to get started and avoid those footguns. Start with Choosing Your Setup. We'd love to hear from you on X, Discord, or wherever you usually reach us.